programming4us


Windows Server

Windows Server 2008 R2 and Windows 7 : Deploying Branchcache (part 1)

- Free product key for windows 10
- Free Product Key for Microsoft office 365
- Malwarebytes Premium 3.7.1 Serial Keys (LifeTime) 2019
4/24/2012 3:16:51 PM
After you have properly designed your BranchCache solution, you will be ready to test your design. In this section, we will explore the process of setting up and testing BranchCache. In this lab, we will be using a central file server (LABFS1) and a hosted mode cache server (LABBC1).

First we need to set up the file server to support BranchCache features. On LABFS1, perform the following:

1.
Open ServerManager.

2.
Select the Roles node then click the link Add Roles.

3.
Click Next to start the Add Roles Wizard.

4.
Select the File Services role. Then click Next.

5.
On the File Services summary page, click Next.
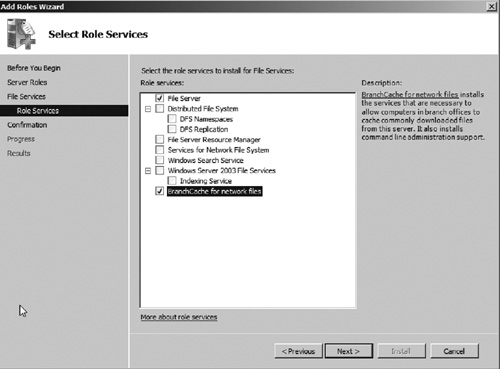
6.
Select the role services File Server and BranchCache for network files (see Figure 1). Then click Next.

Figure 1. Installing BranchCache Role Service.

7.
Verify the settings on the confirmation page, and then click Install.

8.
After the installation finishes, click Close.

Note that BranchCache does not add an administrative node to the Server Manager interface.

After adding the role service, you will need to configure hash publication. This can be done by creating an Active Directory group policy or by modifying the local group policy on the file server. In this exercise, we will configure hash publications, using the local policy on the file server. To configure hash publication, perform the following:

1.
Open the Local Group Policy Editor by opening Start | Run. Then type gpedit.msc and click OK.
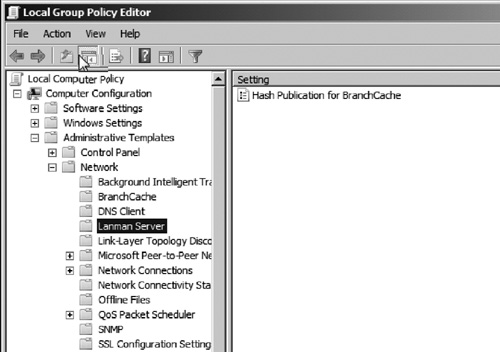
2.
Expand the nodes Computer Configuration | Administrative Templates, Network, Lanman Server.

3.
Select the node Lanman Server as seen in Figure 2.
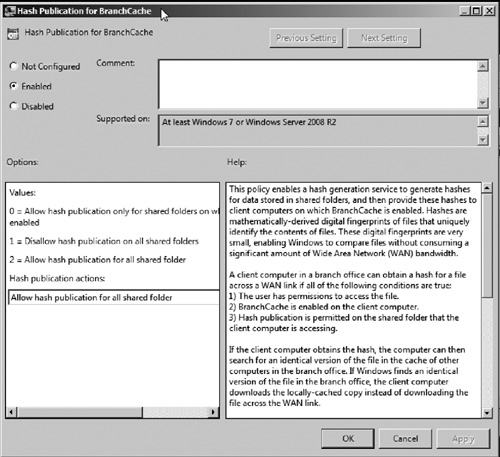
Figure 2. Local Group Policy Editor.

4.
Open the policy object Hash Publication for BranchCache from the middle pane.

5.
Select the option to Enable the policy. Then select the option to Allow hash publication for all shared folders (see Figure 3). Then click OK.

Figure 3. Enable Hash Publication.

After enabling hash publication, you will need to enable BranchCache on shared folder that you wish to be cached in the branch office. Perform the following to enable BranchCache on a shared folder:

1.
Open the Share and Storage Management console from Start | Administrative Tools | Share and Storage Management.
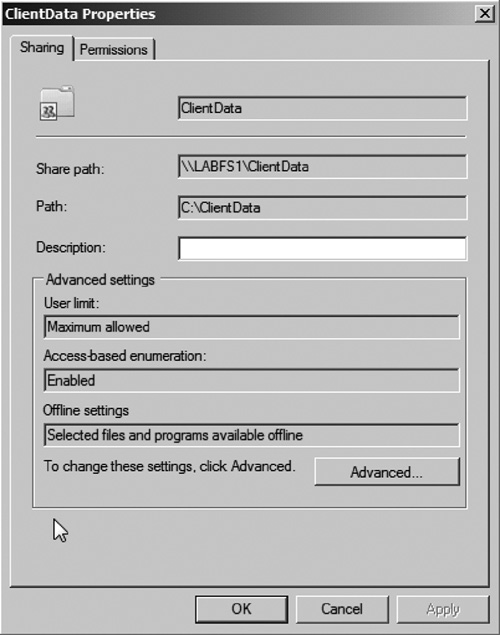
2.
Right click on the shared folder you want to enable BranchCache and choose Properties. This will open the shared folder properties window as seen in Figure 4.
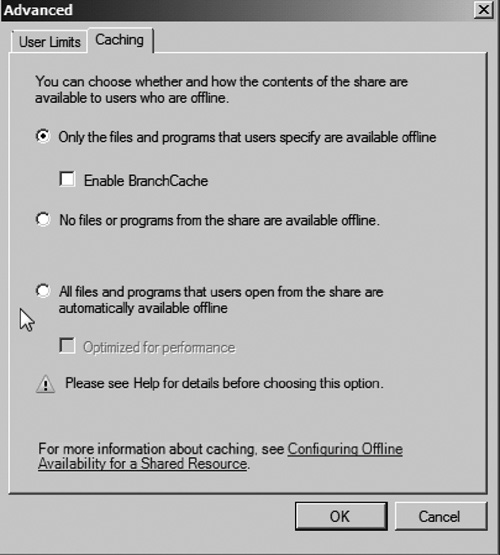
Figure 4. Shared Folder Properties.


3.
Click Advanced to open the Advanced window. Then click the Caching tab as seen in Figure 5.

Figure 5. Shared Folder Advanced settings.


4.
Select the option Enable BranchCache. Then click OK.

5.
Click OK to close the shared folder properties window.
Other -----------------
- Windows Server 2003 : Managing Daily Operations - Using the AT Command & Using cron
- Windows Server 2003 : Managing Daily Operations - Delegating Control & Using Task Scheduler
- Windows Server 2003 : Auditing Events (part 2) - Setting the Size of Event Logs
- Windows Server 2003 : Auditing Events (part 1) - Audit Settings for Objects
- Windows Server 2003 : Using the Secondary Logon
- Windows Server 2003 : Using the Microsoft Management Console - Creating an MMC-Based Console with Snap-Ins
- Installing Windows Small Business Server 2011 : Selecting Network Components (part 2) - Preparing for the Installation
- Installing Windows Small Business Server 2011 : Selecting Network Components (part 1) - Selecting an Internet Service Provider
- Planning a Windows SBS 2011 Deployment
- Windows Small Business Server 2011 : A Networking Primer - Understanding Domains
- Windows Server 2008 : Using wbadmin (part 2) - Backing Up & Restoring Volumes with wbadmin
- Windows Server 2008 : Using wbadmin (part 1)
- Windows Home Server 2011 : Understanding Security Groups & Adding a New User
- Setting Up Your Windows Home Server 2011 Network : Handling Multiple Network Subnets & Making a Remote Desktop Connection to the Server
- Windows Small Business Server 2011 : A Networking Primer - Ethernet/IEEE 802.3 & TCP/IP Basics
- Windows Small Business Server 2011 : A Networking Primer - Networking Hardware
- Windows Server 2008 Server Core : Installing Applications with the MSIExec Utility
- Windows Server 2008 Server Core : Getting System Configuration Information with the SystemInfo Utility
- Setting Up Your Windows Home Server 2011 Network : Troubleshooting Network Problems (part 2)
- Setting Up Your Windows Home Server 2011 Network : Troubleshooting Network Problems (part 1)


Top 10
 
- Microsoft Visio 2013 : Adding Structure to Your Diagrams - Finding containers and lists in Visio (part 2) - Wireframes,Legends
- Microsoft Visio 2013 : Adding Structure to Your Diagrams - Finding containers and lists in Visio (part 1) - Swimlanes
- Microsoft Visio 2013 : Adding Structure to Your Diagrams - Formatting and sizing lists
- Microsoft Visio 2013 : Adding Structure to Your Diagrams - Adding shapes to lists
- Microsoft Visio 2013 : Adding Structure to Your Diagrams - Sizing containers
- Microsoft Access 2010 : Control Properties and Why to Use Them (part 3) - The Other Properties of a Control
- Microsoft Access 2010 : Control Properties and Why to Use Them (part 2) - The Data Properties of a Control
- Microsoft Access 2010 : Control Properties and Why to Use Them (part 1) - The Format Properties of a Control
- Microsoft Access 2010 : Form Properties and Why Should You Use Them - Working with the Properties Window
- Microsoft Visio 2013 : Using the Organization Chart Wizard with new data
- First look: Apple Watch

- 3 Tips for Maintaining Your Cell Phone Battery (part 1)

- 3 Tips for Maintaining Your Cell Phone Battery (part 2)
programming4us programming4us